

1. 站点配置 #
上文拷贝 exampleSite 后,站点文件夹结构变成: |
|
|---|---|
| my-site/ | |
| ├── archetypes/ | |
| │ └── default.md | |
| ├── assets/ # 存放由 Hugo Pipes 处理的文件 | |
| ├── config/ # 存放Blowfish 主题的配置文件 | |
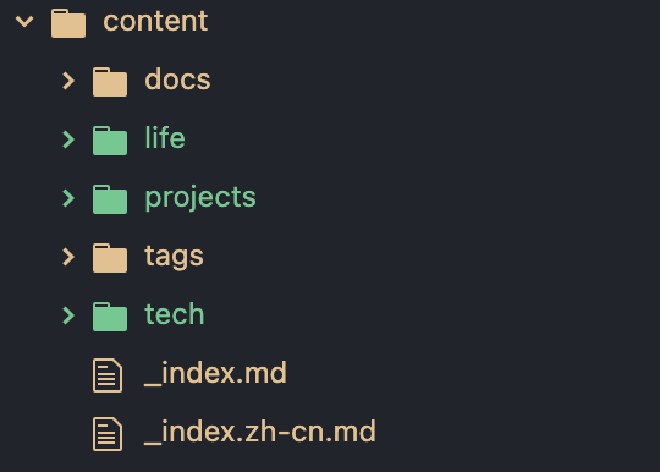
| ├── content/ # 存放博客内容的 markdown 文件 | |
| ├── data/ # 存放由 Hugo 处理的数据文件 | |
| ├── i18n/ # 多语言支持 | |
| ├── layouts/ # 存放布局文件 | |
| ├── static/ # 存放静态文件如图片、CSS 和 JS 文件 | |
| ├── themes/ # 存放不同主题 | |
| └── hugo.toml <– 站点配置文件 |
站点配置 #
相比之前,新增了 config 文件夹,里面包含默认配置文件。config/_default/ 文件夹中包含了以下配置文件:
config/_default/
├─ hugo.toml
├─ languages.en.toml
├─ markup.toml
├─ menus.en.toml
├─ module.toml
└─ params.toml
站点配置通过 config/_default/hugo.toml 文件管理,Blowfish 主题使用的所有设置如下所示。以下是配置项的简要说明:
| Name | Default | Description | My Value |
|---|---|---|---|
theme |
"blowfish" |
主题名称。Hugo Modules 不需要此配置 | |
baseURL |
Not set | 网站根URL | https://yuzhencode.github.io/ |
为了使 Blowfish 更灵活,每个站点至少要创建一个语言配置文件。Blowfish 默认提供 config/_default/languages.en.toml 文件支持英语。
Global 设置 #
| Name | Default | Description | My Value |
|---|---|---|---|
title |
"Blowfish" |
网站标题,显示在页头和页脚 | Yuzhen Blog |
Params 设置 #
| Name | Default | Description | My Value |
|---|---|---|---|
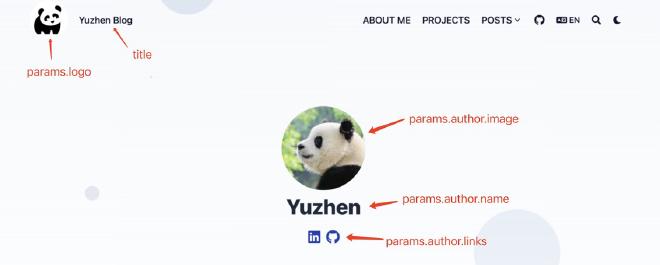
params.logo |
Not set | 网站 logo 文件的相对路径,文件应位于 assets/ 文件夹中,建议使用 2 倍分辨率 |
img/your-site-logo.png |
params.description |
Not set | 网站描述,显示在网站元数据中 |
Author 设置 #
| Name | Default | Description | My Value |
|---|---|---|---|
params.author.name |
Not set | 作者名字,显示在文章页和主页 | Yuzhen |
params.author.image |
Not set | 作者头像的路径,建议使用 1:1 的宽高比 | img/author.jpeg |
params.author.bio |
Not set | Markdown 格式的作者简介,显示在文章底部 | customisation |
params.author.links |
Not set | 作者的相关链接,如 GitHub 等,支持 SVG 图标 | customisation |
更多细节请查看 Blowfish 官方文档。
2. 一次性生成适用于多个浏览器、多个平台的图标 #
每个平台有不同的图标设计要求,因此不能在所有地方使用相同的图片。首先选择你自己的图标图像,然后使用 RealFaviconGenerator 网站根据不同平台生成适合的图标。
你可能需要以下格式的图标:
apple-touch-icon.png (180x180)favicon-32x32.png (32x32)favicon-16x16.png (16x16)mstile-150x150.png (150x150)android-chrome-192x192.png (192x192)android-chrome-512x512.png (512x512)favicon.icobrowserconfig.xmlsite.webmanifest
将生成的图片和代码放在博客根目录的 /static 目录下即可,在本地使用 hugo server 预览效果。部署到 GitHub Pages 后,可能需要一些时间才能生效。

3. 设置菜单 #
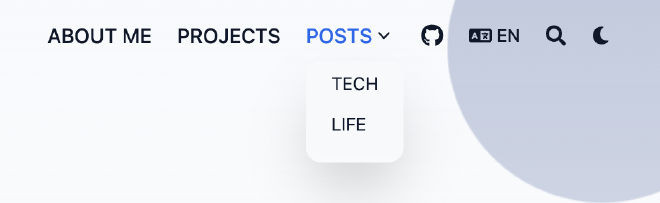
Blowfish 提供两个菜单:main 菜单显示在网站头部,footer 菜单显示在页面底部。配置文件位于 menus.en.toml 中,若使用多语言功能,需重命名为对应语言的代码。
# config/_default/menus.toml
[[main]]
  name = "ABOUT ME"
  pageRef = "docs/about-me"
  weight = 10

[[main]]
  name = "PROJECTS"
  pageRef = "projects"
  weight = 20

[[main]]
  name = "POSTS"
  weight = 30

  [[main]]
    name = "TECH"
    parent = "POSTS"
    pageRef = "tech"
    weight = 40

  [[main]]
    name = "LIFE"
    parent = "POSTS"
    pageRef = "life"
    weight = 50

[[main]]
  identifier = "github"
  pre = "github"
  url = "https://github.com/yuzhencode"
  weight = 400

[[footer]]
   name = "Tags"
   pageRef = "tags"
   weight = 10

[[footer]]
   name = "Authors"
   pageRef = "authors"
   weight = 20
4. 主题参数 #
Blowfish 提供了大量参数来控制主题功能,这些参数位于 config/_default/params.toml 文件中。
全局参数 #
| Name | Default | Description |
|---|---|---|
colorScheme |
"blowfish" |
颜色方案,例如 avocado、fire、ocean 等 |
defaultAppearance |
"light" |
默认主题外观,可以是 light 或 dark |
enableSearch |
false |
启用搜索功能 |
页头设置 #
| Name | Default | Description |
|---|---|---|
header.layout |
"basic" |
页头布局,支持 basic、fixed 等 |
页脚设置 #
| Name | Default | Description |
|---|---|---|
footer.showMenu |
true |
显示页脚菜单 |
footer.showScrollToTop |
true |
显示返回顶部按钮 |
主页设置 #
| Name | Default | Description |
|---|---|---|
homepage.layout |
"profile" |
主页布局,例如 page、hero 等 |
homepage.showRecent |
false |
是否显示最新文章列表 |
文章页设置 #
| Name | Default | Description |
|---|---|---|
article.showDate |
true |
是否显示文章日期 |
article.showLikes |
false |
是否显示文章点赞数(需集成 Firebase) |
还有更多的页面列表、分类法、术语等设置,请参考 Blowfish 配置文档。
5. 新建博客文章 #
由exampleSite中我们可以看到Blowfish已经给出模版文章,预览请点击链接,将exampleSite/content/guides/template文件夹copy至my-site/archetypes/下,并rename为deault,同时你可根据自己的需求更改模版文件。
然后你可以通过以下命令创建一篇新的博客文章:
$hugo new tech/test
Content dir "yuzhenblog-source/yuzhen/content/tech/test" created
创建文件夹时可能遇到多语言设置的错误,删除 index.it.md 和 index.ja.md 文件后可以解决问题。更多讨论请参考 Hugo Issue 9204。如果你有更好的解决方法欢迎告知,以下是报错信息
panic: [BUG] no Page found for "yuzhenblog-source/yuzhen/content/tech/test/index.it.md"

goroutine 1 [running]:
github.com/gohugoio/hugo/create.(*contentBuilder).applyArcheType(0x140009d4a80, {0x14000d139d0, 0x65}, {0x1066a06e0, 0x14000ad9b40})
	github.com/gohugoio/hugo/create/content.go:273 +0x2b8
github.com/gohugoio/hugo/create.(*contentBuilder).buildDir(0x140009d4a80)
	github.com/gohugoio/hugo/create/content.go:179 +0x51c
github.com/gohugoio/hugo/create.NewContent.func1()
	github.com/gohugoio/hugo/create/content.go:92 +0x268
github.com/gohugoio/hugo/create.NewContent(0x14000b608c0, {0x0, 0x0}, {0x16d33ba21, 0x9}, 0x0)
	github.com/gohugoio/hugo/create/content.go:106 +0x480
github.com/gohugoio/hugo/commands.newNewCommand.func1({0x0?, 0x0?}, 0x0?, 0x140008ad040, {0x140009b0170, 0x0?, 0x0?})
	github.com/gohugoio/hugo/commands/new.go:60 +0x160
github.com/gohugoio/hugo/commands.(*simpleCommand).Run(0x0?, {0x1066956a8?, 0x107ad9600?}, 0x0?, {0x140009b0170?, 0x141f8f4500000000?, 0x1400087f9f8?})
	github.com/gohugoio/hugo/commands/commandeer.go:608 +0x48
github.com/bep/simplecobra.(*Commandeer).compile.func1(0x140005e5900?, {0x140009b0170?, 0x4?, 0x10483e075?})
	github.com/bep/simplecobra@v0.4.0/simplecobra.go:113 +0x54
github.com/spf13/cobra.(*Command).execute(0x1400098b208, {0x140009b0130, 0x1, 0x1})
	github.com/spf13/cobra@v1.8.0/command.go:983 +0x840
github.com/spf13/cobra.(*Command).ExecuteC(0x14000537508)
	github.com/spf13/cobra@v1.8.0/command.go:1115 +0x344
github.com/spf13/cobra.(*Command).ExecuteContextC(...)
	github.com/spf13/cobra@v1.8.0/command.go:1048
github.com/bep/simplecobra.(*Exec).Execute(0x14000376cc0, {0x1066956a8?, 0x107ad9600?}, {0x14000333a80?, 0x106226f80?, 0x102b10a9c?})
	github.com/bep/simplecobra@v0.4.0/simplecobra.go:155 +0xb4
github.com/gohugoio/hugo/commands.Execute({0x1400011a490, 0x2, 0x2})
	github.com/gohugoio/hugo/commands/commandeer.go:67 +0x284
main.main()
	github.com/gohugoio/hugo/main.go:25 +0x70
一个有着个人特色的网站创建成功,下一篇将讲解如何使用GitHub Pages发布博客