

Why Rebuild #
Recently, I’ve been preparing for the AWS SAA exam and learning new technologies through side projects. I want to document this journey. Since all the previous blog files were on an old computer in China and the GitHub repository only had public content, I decided to restart my blog as a way to practice writing and keep records.
To avoid falling into the same trap again, this time I want a solution that meets the following requirements:
- Supports markdown and ensures easy migration in the future
- Allows for service hosting
- Full control over source files and site files
- The framework must have strong community support
- No data loss due to switching computers
The Hugo + GitHub Pages solution better meets my needs, and I will continue to deploy using Notion + GitHub Actions in the future.
Local Setup #
Let’s start the journey with Hugo. The official documentation is very detailed, and the following is just a personal record.
1. Hugo Environment #
The installation is very simple. I’m using macOS with Homebrew.
# Open Terminal
$brew install hugo
Once complete, you can verify the installation with the following command:
$hugo version
2. Git Environment #
The installation is equally simple.
$brew install git
# Similarly, verify the installation with the following command
$git version
3. Create a Site #
To create a new web site, you can execute the following command:
$hugo new site my-site
# replace 'my-site' with your custom blog name, e.g., YuzhenBlog
Hugo will generate a custom site in the current directory.
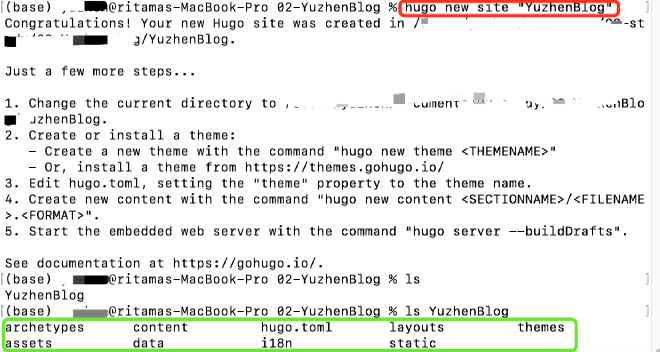
At this point, the site has been created.
| The structure is as follows: | |
|---|---|
| my-site/ | |
| ├── archetypes/ | |
| │ └── default.md | |
| ├── assets/ # Stores files processed by Hugo Pipes | |
| ├── content/ # Stores markdown files as blog content | |
| ├── data/ # Stores data processed by Hugo | |
| ├── i18n/ | |
| ├── layouts/ # Stores layout files | |
| ├── static/ # Stores static files like images, CSS, and JS files | |
| ├── themes/ # Stores different themes | |
| └── hugo.toml <– site configuration |
For detailed explanation, please refer to Directory structure
4. Configuring the Blowfish Theme #
Refer to the theme documentation
4.1 Download the Blowfish Theme
There are several ways to install the Blowfish theme in your Hugo site.
- Manual File Copy
- Install Using Git Submodule (Recommended)
If you’re unsure which one to choose, go with the Git submodule method. Let’s start with the manual method that doesn’t require a Git environment locally.
Manual File Copy
- Download the latest theme source code. Download from GitHub
- Unzip it, rename the folder to
blowfish, and move it to thethemes/directory under your Hugo project root.- Then modify
hugo.toml
Install Using Git Submodule
This method ensures that the theme is installed and updated simply and quickly. Besides Hugo, you also need to ensure that Git is installed on your local machine.
Navigate to the site directory you just created
my-site, initialize a newgitrepository, and add Blowfish as a submodule.$cd my-site $git init $git submodule add -b main https://github.com/nunocoracao/blowfish.git themes/blowfishThen modify
hugo.toml
- Install Using Hugo Module This is not covered in this article, but you can refer to the link for more information.
4.2 Next, add theme = "blowfish" in the hugo.toml file. Then start the service as follows
$hugo server # Start the service and follow the prompt to open the site preview
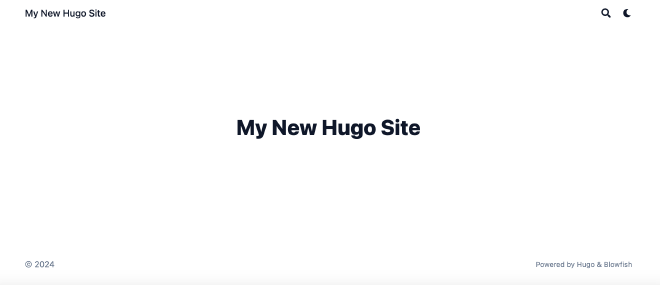
At this point, the Blowfish theme has been successfully configured.
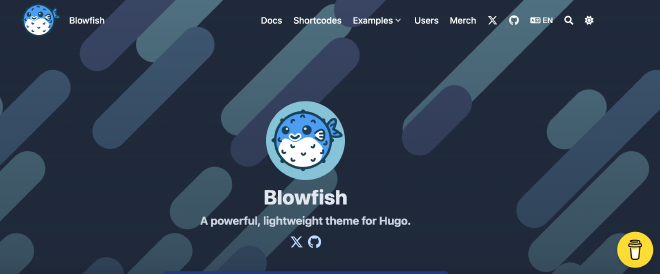
4.3 exampleSite
You might wonder why the page looks different from the theme. That’s because other background images, site logos, styles, and content have not yet been added. The simplest way to get started is to copy all files from my-site/themes/blowfish/exampleSite to the site root directory, which is my-site/. Restart the service to get the following preview, and you can start your customization journey.
reference
Hugo Documentation https://gohugo.io/documentation/
Blowfish https://blowfish.page/